
Stable Diffusion web UIを使って、アニメ風2次元画像の生成は色々やってきましたが、実写写真風の女性ポートレートはどこまでできるのか色々な学習済みモデルを使ってみました。また、先日、ControlNetを使った姿勢指定を紹介しましたが、openposeの姿勢認識を修正できるopenpose-editorもインストールして使ってみましたので、紹介したいと思います。
Cafe Instagram
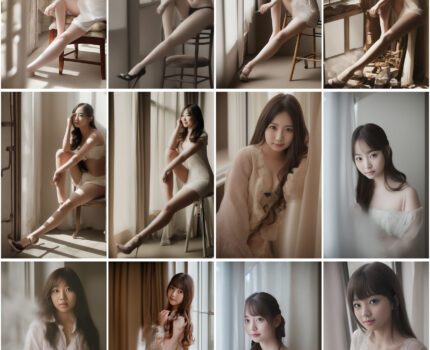
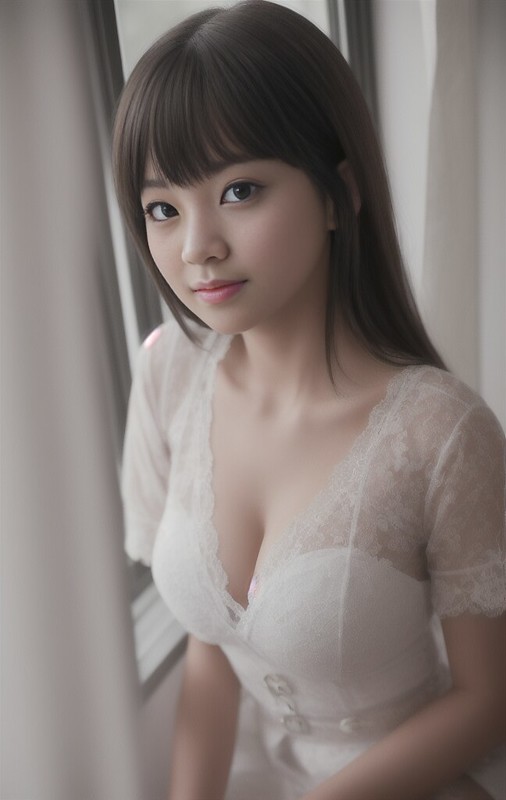
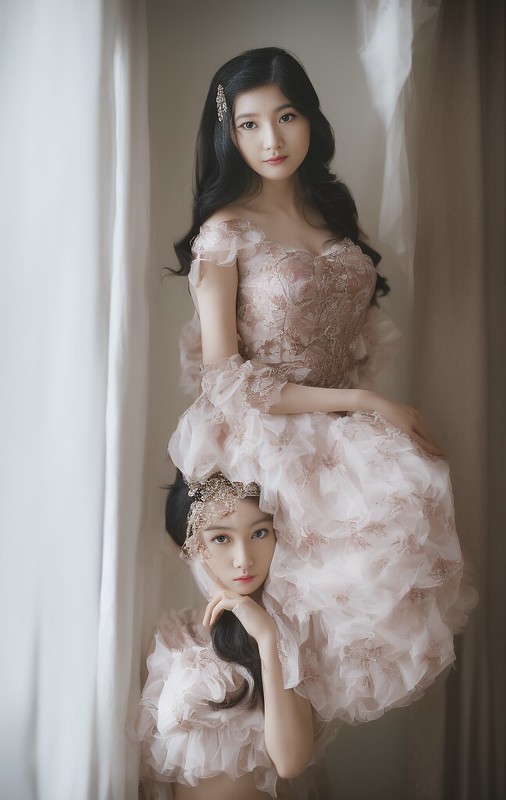
まずはこちらの記事でも紹介したcafe-instagram-sd-1-5-v6(instagram-latest-plus-clip-v6e1_50000)。とても日本人女性の顔などの生成クオリティが高い感じです。姿勢や手足などは少し苦手で変な感じになることも。
https://huggingface.co/cafeai/cafe-instagram-sd-1-5-v6

Hyperanatomy MegaMerge
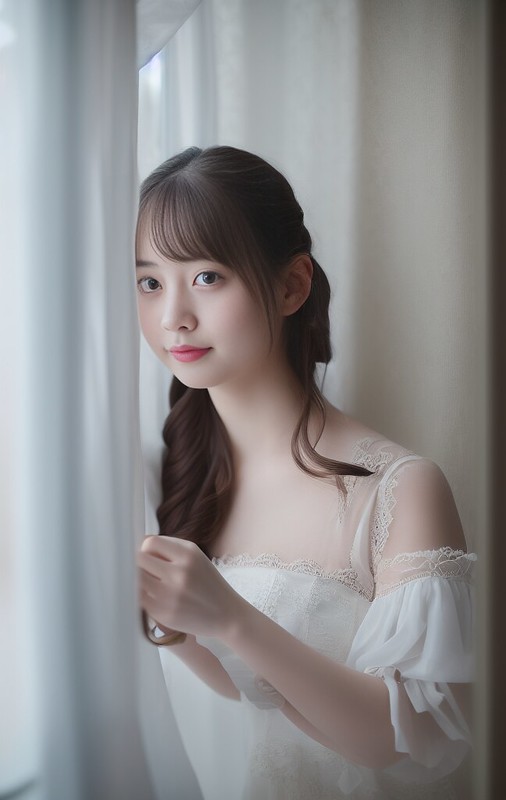
HassanBlend、PFG、PurePornPlusの3つをマージした人間の描写に適したモデルです。NSFW(Not safe for work)なアダルト系画像を含めて学習しているので、そういった画像も生成しがちなので要注意です。でも、そのおかげか手足や肌や姿勢の表現がリアルです。
ただし少し絵画感のあるのっぺりとした画像が生成されることが多い感じですね。
https://civitai.com/models/3241/hyperanatomy-megamerge
(モデルのダウンロードにはCivitaiのユーザ登録が必要です)
Analog Diffusion
アナログ写真を学習したモデル。プロンプトにanalog styleを追加して使います。写真ならではの美しいポートレート写真を生成できます。日本人より海外の人の方が得意な感じ?良い画像を生成するためのプロンプトが少しむずかしいです。
https://huggingface.co/wavymulder/Analog-Diffusion

モデルのマージ
Hyperanatomy MegaMerge自体もそうでしたが、学習済みモデルはマージすることができます。Stable Diffusion web UIでは、Checkpoint Mergerタブで、Primery model(A), Secondary model(B)を選んでMultiplierにBの比率を指定して、”Merge”ボタンを押すだけ。簡単ですね。
モデルをマージすることで、モデルの特徴が混じり合うことで、より良くなったり悪くなったりします。

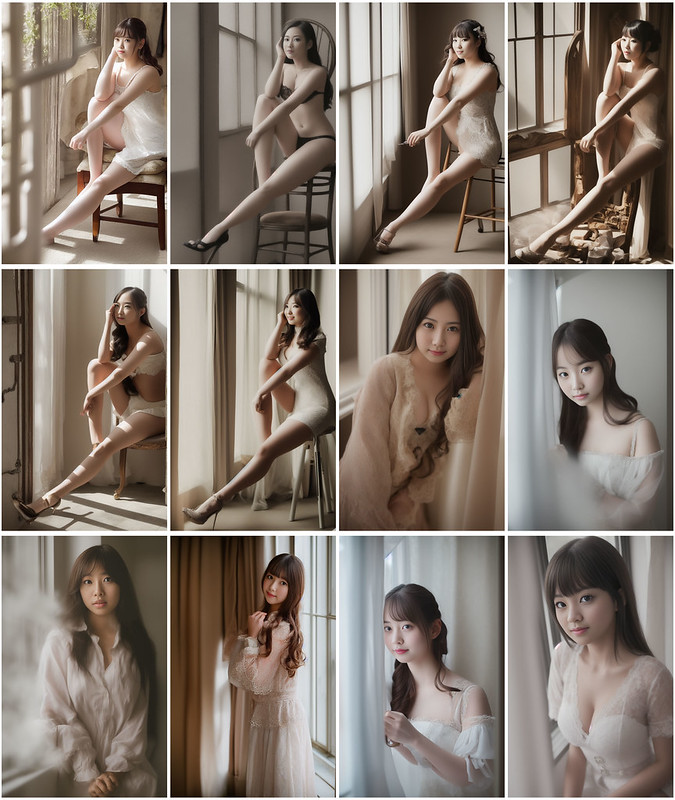
上記の3つのモデルをマージしてみました。


上記はかなりうまく生成したもののみ載せていますが、2次元画像と比べるとあまり成功確率は高くなく変な画像が生成されるので、ガチャを引く感じで。たまに下記のように心霊写真みたいな面白い画像も生成されますよ。


ControlNetの姿勢を編集できるOpenPose Editor
下記記事でControlNetを使った画像による姿勢の指定を紹介しましたが、openposeを使った場合、画像からの姿勢の認識を間違えることがあります。
分かりづらいですが、姿勢の認識がうまくいっていない例

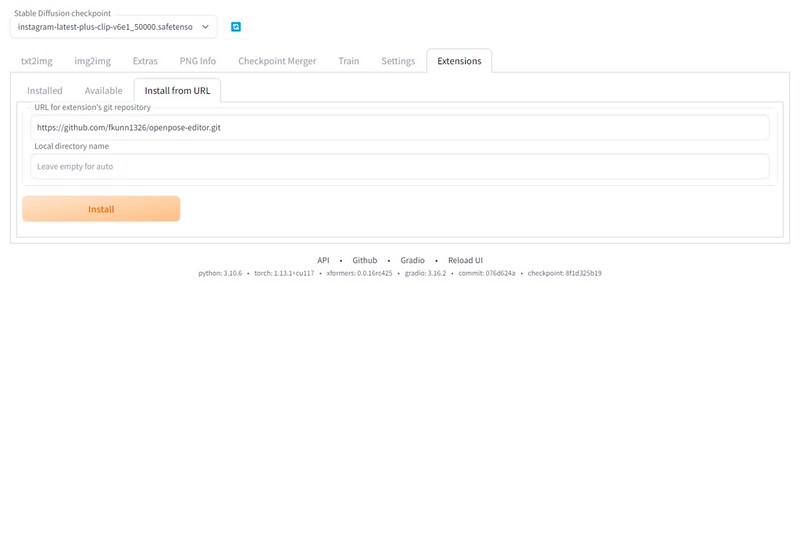
openposeの姿勢を編集できる拡張機能としてopenpose-editorというのが公開されています。
インストールするには”Extensions”タブの”Install from URL”の”URL for extension’s git repository”に下記を入力して、”Install”ボタンを押します。
https://github.com/fkunn1326/openpose-editor.git
インストールが終わると”Installed”タブで、”Apply and restart UI”ボタンを押します。

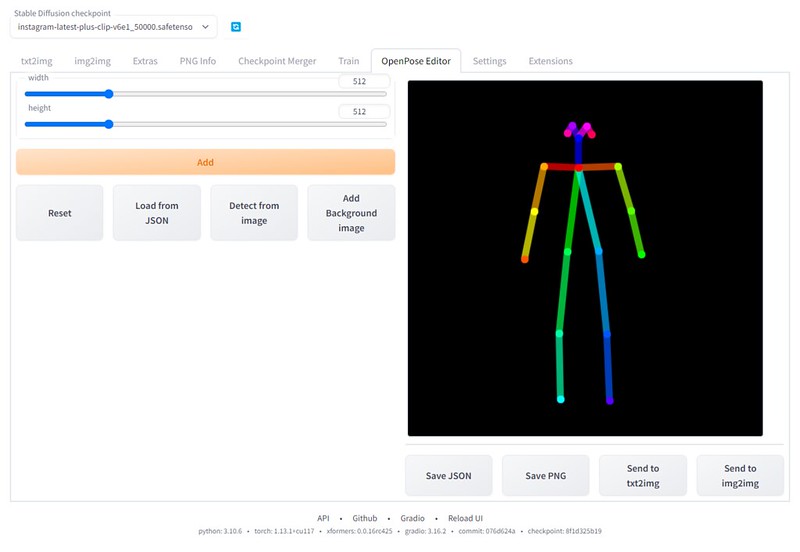
“OpenPose Editor”というタブが追加されます。
骨格モデルが表示されるので、関節部分を移動して姿勢を編集することができます。
1から編集は難しいので、”Detect from image”を押して元となる画像を選択します。
自動認識で骨格モデルが表示されます。写真に合わせて関節部分を修正したり、変更したい部分を修正したり、拡大縮小したりできます。
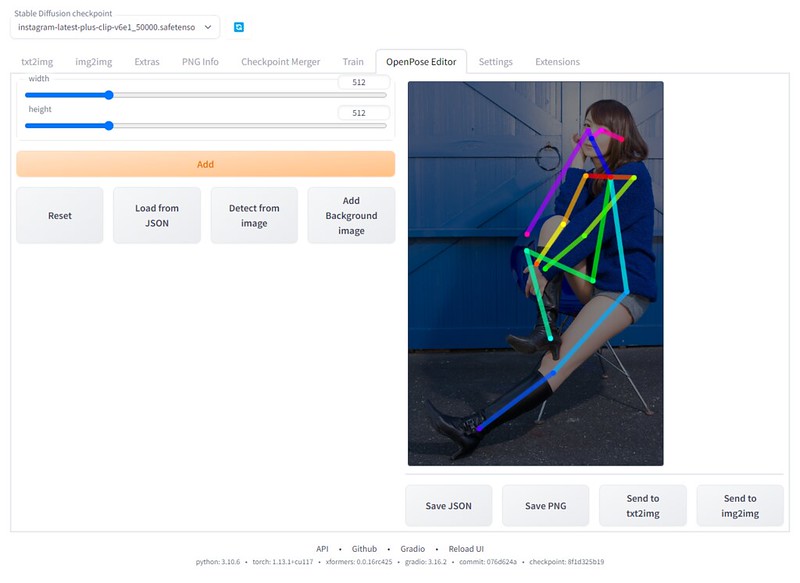
修正したら、”Send to txt2img”を押して、txt2imgのControlNetに画像を送ります。

ControlNetは、Processorは指定せずにModelに”control_openpose-fp16.safetensors”を指定すれば、姿勢が反映されます。
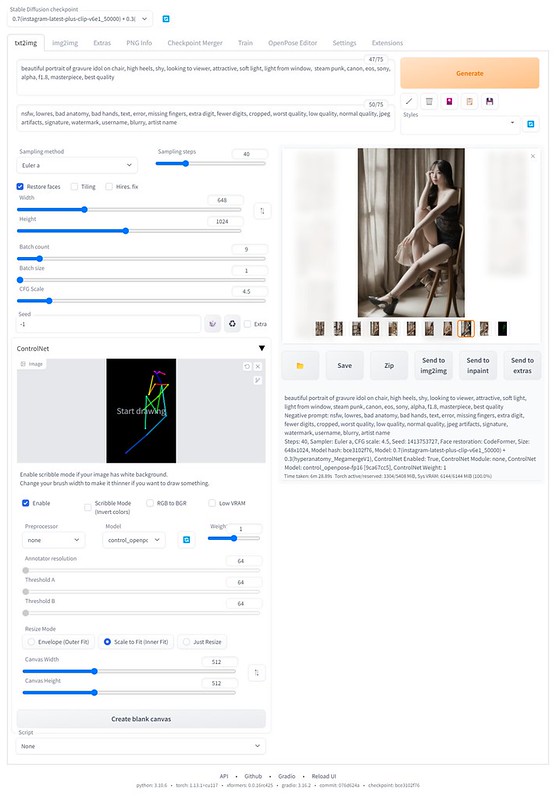
姿勢を指定してみた例
姿勢の指定に使用させていただいたのはこちらの記事の紗々さんの写真。
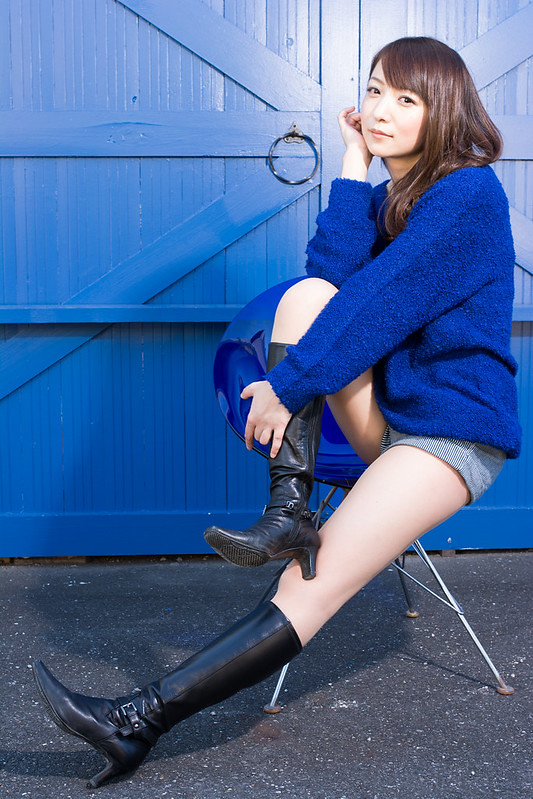
なかなか難しいポーズです。特にAIにとっては、姿勢を指定しても腕の向こうの脚がつながっているように描写するのがハードルが高く失敗の連続。img2imgは使わず、ぱっと見、変じゃなさそうな生成画像を選んでみました。

Cafe Instagramは顔などは魅力的なのですが、やはり手足の表現がなかなかうまくいかず。
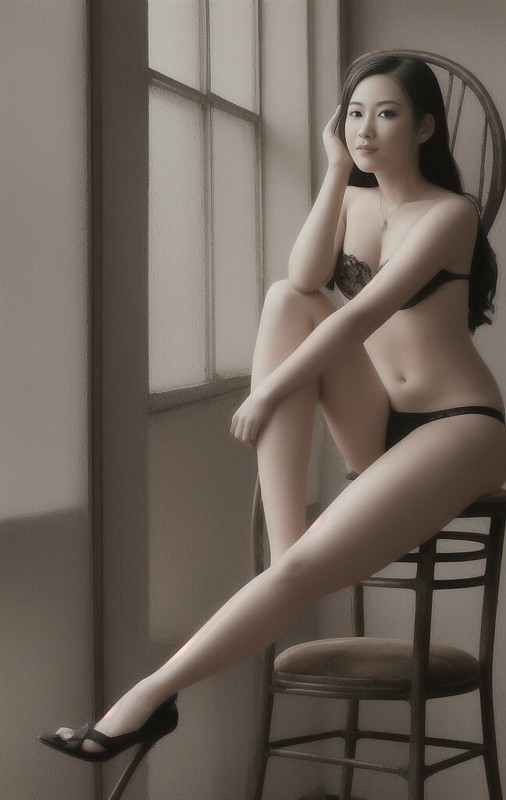
Hyperanatomy Megamergeは腕や脚や姿勢の表現は良いけど、光や顔などの描写がいまいち。あと露出狂気味。
Analog Diffusionでは、良い感じのが出力できず。Cafe InstagramとAnalog Diffusionをマージしたモデルで。

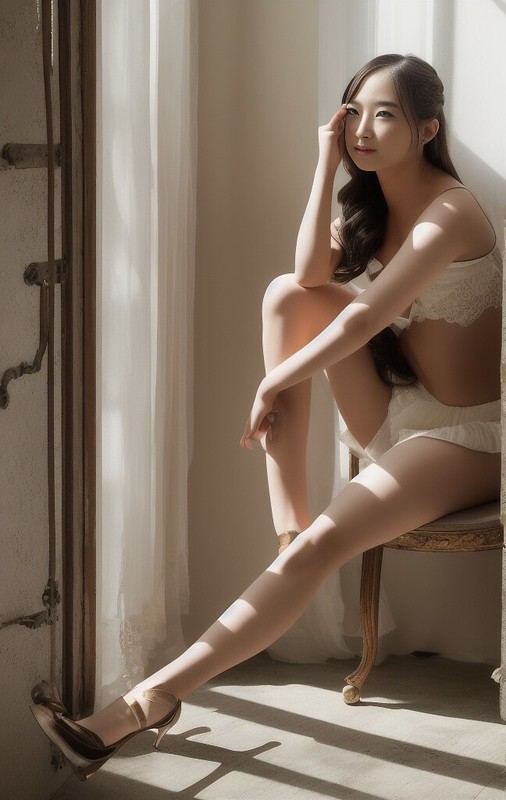
3つのモデルをマージすると、良い感じのが出力されました。椅子などがおかしいですが。
AIが苦手だった手足や姿勢もかなり改善され、img2img(一部描き直し)を併用すれば、実写写真のような画像を自由に生成できるようになりましたね。
関連投稿:
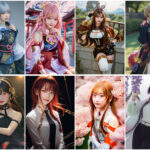 最新実写美少女モデル #BRAV5 と イラストモデル #AnythingV4 の併用による AIコスプレ写真 と #DepthLib での手の補正 #StableDiffusion #LoRA #ControlNet #コスプレ
 言葉じゃなくて絵で画像生成AIに姿勢を指示できるように #StableDiffusion web UI の ControlNet 拡張
 Stable Diffusion の mov2mov で AI動画作成 #StableDiffusion #mov2mov #ControlNet
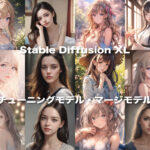 #StableDiffusion XL (#SDXL) の ControlNet や チューニングモデル・マージモデル を試してみました
ピンバック: 言葉じゃなくて絵で画像生成AIに姿勢を指示できるように #StableDiffusion web UI の ControlNet 拡張 | Digital Life Innovator
ピンバック: ひなまつり AIが描く 実写風アニメ風雛人形 と バーチャルポートレート #StableDiffusion | Digital Life Innovator
ピンバック: 2023年の振り返り | Digital Life Innovator